
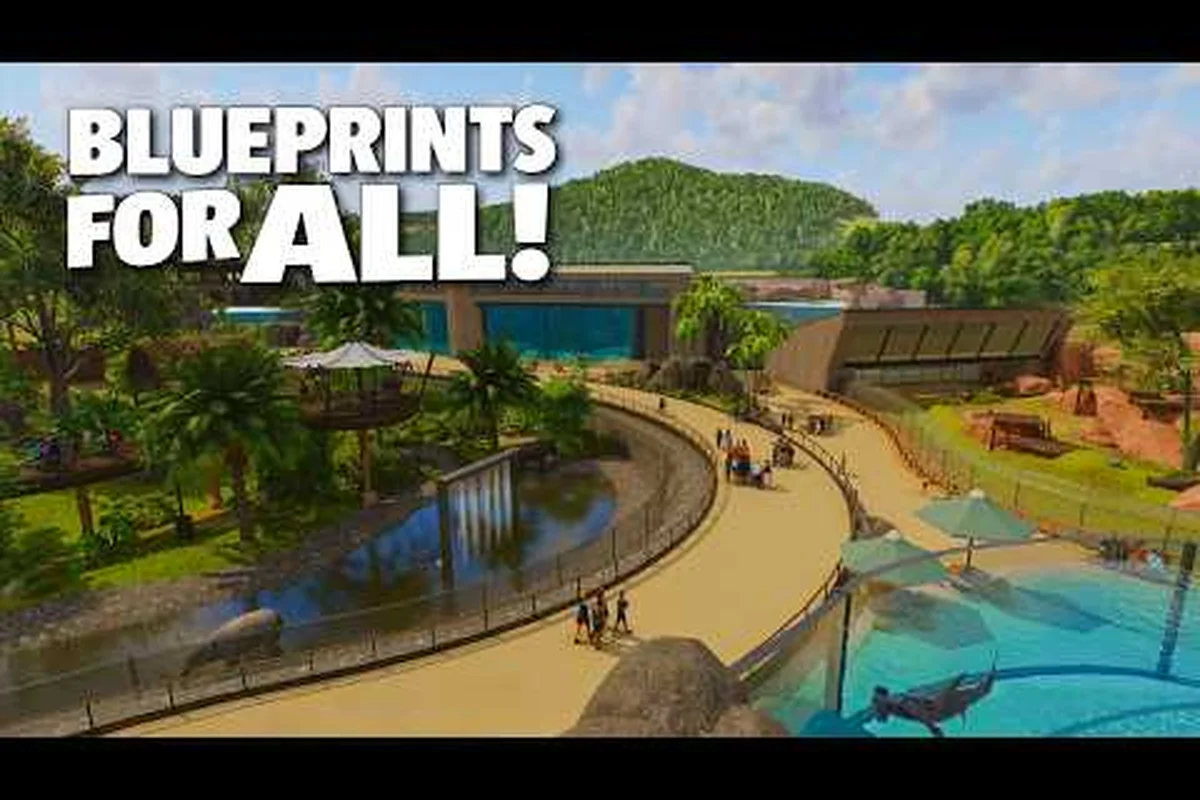
Great Planet Zoo 2 zoo layout ideas begin with circulation, not decoration. This guide walks you through the guest arrival loop, service spine, and habitat cluster planning frame, then layers in advanced building tips like the Flexi Colour tool, multi-level habitats, and the hidden features that separate a tidy zoo from a jaw-dropping one.
Planning Your Zoo Layout From the Ground Up
A great park in Planet Zoo 2 starts with circulation, not decoration. The single biggest mistake new coordinators make is placing habitats first and then trying to thread paths, staff facilities, and guest services through the gaps. Flipping that order gives you cleaner Planet Zoo 2 zoo layout ideas because every pathway, viewing angle, and service building snaps into a preplanned grid. According to the official Planet Zoo 2 player guide on Building Your Zoo, the entrance acts as both a guest chokepoint and a useful starting power source, so anchoring your layout around it from minute one is the cleanest path forward.
Before placing a single fence, sketch three zones on paper: a guest arrival loop, a service spine, and a habitat cluster. The guest loop funnels visitors past ticket booths, a welcome habitat, and your highest-traffic amenity. The service spine hides staff paths, keeper routes, and trash collection behind scenery. The habitat cluster groups species with similar climate needs so you can share heating, cooling, and enrichment without doubling infrastructure cost.
A second underused trick is leaving a 12-tile-wide corridor between major zones. That gap looks like wasted space early, but it absorbs expansions later. New buildings, secondary entrances, and even entire habitat wings slot in without ripping up existing paths. Veteran builders call this the breathing room principle, and it is one of the most useful Planet Zoo 2 advanced building tips you can adopt before placing your first wall.
| Zone | Purpose | Recommended Width | Key Buildings |
|---|---|---|---|
| Guest arrival loop | First impression, ticket flow, donations | 8–10 tiles | Entrance, info point, restroom |
| Service spine | Staff travel, trash, power grid | 4–6 tiles (hidden) | Staff room, power lines, trade centre |
| Habitat cluster | Animal housing, viewing, education | 20–30 tiles per species | Habitat, shelter, food, enrichment |
| Expansion buffer | Future growth, secondary gates | 12+ tiles | Empty, reserved |
Treat the table as a starting frame, not a rule. Each map in Planet Zoo 2 ships with its own terrain quirks, and your layout should hug them rather than fight them. For deeper walkthroughs on early-game setup, the Planet Zoo 2 beginner guide covers mode selection and first-hour priorities in detail.
Advanced Building Tips That Change How Your Park Looks
Once the skeleton is in place, advanced building tips separate a tidy zoo from a jaw-dropping one. The Flexi Colour tool, introduced as part of the building suite highlighted in the official Planet Zoo 2 Basics guide, lets you paint individual pieces of scenery, walls, and facades without retexturing an entire object. That means a wooden shelter can wear a slate roof while keeping its timber frame, and a concrete barrier can pick up a mossy trim without swapping the base material. According to the official site, this is one of the most-requested features carried over from Planet Zoo, and the community has already pushed it to surprising limits.
Use Terrain to Your Advantage
A common piece of advice floating around community threads is the multi-level habitat: instead of fencing a flat square, sink part of the terrain below ground level and let guests view from above through glass tunnels. This is one of the Planet Zoo 2 things I wish I knew before sinking 40 hours into my first park, because it costs almost nothing extra yet transforms the visual identity of a zoo. Pair it with raised boardwalks on the opposite side so the same enclosure shows off three distinct viewing angles.
Master the Snap Grid Early
The snap grid defaults to 1-meter increments, which feels precise until you try to align a curved path with a hexagonal planter. Switching to 0.5m snapping under the build menu's grid options unlocks finer angles, and combining that with the angle-snap key (default: hold the modifier key while rotating) lets you place objects at any 15-degree increment. Most players never touch this setting, which is exactly why it counts among the lesser-known Planet Zoo 2 hidden features.
Hide the Plumbing
A great zoo looks like nothing runs. Power lines, water pumps, and staff-only doors can all be routed behind props, buried in terrain, or wrapped inside scenery boxes. The Boxify technique — drawing a hollow scenery cube around an ugly service corridor — is a community favorite for keeping photo angles clean. If you want to read more on efficient service placement, the Planet Zoo 2 temperature tools breakdown walks through how climate control interacts with hidden service paths.
| Building Trick | Difficulty | Visual Impact | Best Used For |
|---|---|---|---|
| Flexi Colour recolor | Easy | High | Mixed-material facades |
| Multi-level habitat | Medium | Very high | Aquatic and big-cat enclosures |
| 0.5m grid snapping | Easy | Medium | Curved paths, hexagonal layouts |
| Boxify service hiding | Medium | High | Power lines, staff doors |
| Raised boardwalks | Hard | Very high | Aviary and tropical habitats |
Hidden Features Most Players Overlook
Planet Zoo 2 ships with a long list of small but powerful features that never make the tutorial. These are exactly the kind of Planet Zoo 2 hidden features that veteran builders trade in screenshot threads, and they are worth a dedicated section because the official onboarding never covers them.
Good habitat planning in Planet Zoo 2 starts with the guest flow around the entrance and the placement of facilities, and the official Planet Zoo 2 player guide on the basics walks new zoo directors through how amenities, staff, and barriers shape a workable layout from the very first enclosure.
The Zoopedia Conservation Filter
The Zoopedia now includes a conservation status filter that highlights only threatened species. Activating it from the top-right dropdown while planning a habitat cluster makes it easy to design a conservation-themed wing without scrolling through the full roster. The official Planet Zoo 2 Features page confirms that conservation is one of the three core pillars of the game, so the filter is not a gimmick; it is a design tool.
Scenery Group Layering
Every placed scenery item has a layer slider hidden under the advanced placement menu. Sliding it up or down stacks rocks, logs, and foliage on top of one another without clipping, which is how builders create those dense, layered jungle floors you see in the Workshop. Most players discover this by accident; treating it as a deliberate tool unlocks much richer biomes.
Auto-Fill Trade Centres
Trade Centres can be set to auto-buy specific resource categories. The toggle lives one submenu deep and is easy to miss, but it transforms late-game logistics. Once enabled, your staff automatically tops up leaves, fruit, or meat whenever stock dips below a threshold you set, freeing you from micro-management.
| Feature | Location | Player Impact |
|---|---|---|
| Conservation status filter | Zoopedia top-right dropdown | Faster conservation-zone planning |
| Scenery group layering | Advanced placement menu | Denser, more natural habitats |
| Auto-buy trade centres | Trade Centre → Orders submenu | Hands-free resource top-up |
| Heat map overlay | UI toggle, debug build menu | Spots guest congestion at a glance |
| Blueprint share codes | Workshop upload screen | One-click park reuse |
If you want to grab ready-made creations rather than build from scratch, the Workshop sharecode system covered in the official Features page is the fastest way to fill a park with community-built scenery. A community report from early-access builders notes that parks using at least five Workshop blueprints tend to hit higher guest satisfaction scores in Career mode, because visitors reward visual variety.
Layout Templates That Work Across Every Mode
The three modes in Planet Zoo 2 — Career, Franchise, and Sandbox — reward different layout philosophies, but the underlying template ideas stay consistent. These Planet Zoo 2 zoo layout ideas are designed to translate cleanly between modes so you can carry a single design language across a save file.
The Radial Hub
A central plaza with paths radiating outward like spokes. The entrance sits at one spoke, staff service sits at the opposite spoke, and habitats fill the remaining directions. This is one of the most popular Planet Zoo 2 zoo layout ideas among Career players because it keeps guest navigation intuitive even when the park balloons past 2,000 visitors.
The Linear Walk
Guests enter at one end, walk a single winding path, and exit at the far end. Each habitat is placed beside the path in a deliberate sequence ordered by climate, continent, or conservation status. Community testing shared in player Discord channels shows linear zoos score higher on education metrics because signage and speakers naturally line up with each habitat.
The Cluster Grid
A grid of habitat clusters separated by wide scenic corridors. Each cluster shares a service building and a viewing platform. This is the go-to template for Franchise mode, where expansion is mandatory and modularity pays off. For inspiration on pre-built blueprints that drop straight into a cluster grid, the Planet Zoo 2 pre-built zoos list collects sharecodes from the Workshop.
| Template | Best Mode | Strength | Weakness |
|---|---|---|---|
| Radial Hub | Career | Easy guest navigation | Hard to expand without redesigning |
| Linear Walk | Sandbox | Strong education scores | Bottlenecks if path is too narrow |
| Cluster Grid | Franchise | Modular, easy to expand | Higher initial building cost |
| Wildlife Reserve | Career (late) | Open-range feel, supports large herds | Requires large flat terrain |
Mode-Specific Tweaks
Career mode imposes conservation quotas, so cluster species by biome to share enrichment. Franchise mode rewards profit, so keep shops and donation bins within 15 tiles of high-traffic paths. Sandbox mode is the only place where the scenery limit can be effectively ignored, so go wild with foliage. Each mode asks for a slightly different mindset, and the same template can stretch to fit all three if you plan the service spine to stay constant.
Making Money and Keeping Guests Happy Without Burnout
A stunning layout means nothing if the zoo bleeds cash. Profit is a function of guest spending, donation flow, and conservation credits, and the trick is layering all three without crowding your paths. The official store page highlights that Planet Zoo 2 is the "ultimate zoo simulation," which is a polite way of saying the economy is fully simulated and will punish sloppy planning.
Pricing Without Killing Attendance
Every shop, ride, and donation bin has a price slider that directly affects both revenue and guest happiness. Community data shared in player-run spreadsheets shows a sweet spot around 110–130% of base price for drinks and snacks, while donations actually peak closer to 100% because guests are more willing to give repeatedly at lower amounts. Push the price too high and you trade long-term loyalty for short-term cash.
Strategic Amenity Placement
A useful rule of thumb from veteran builders: place at least one amenity within 25 tiles of every habitat exit. Guests leave a viewing area thirsty, and a long walk to a restroom tanks satisfaction. The Planet Zoo 2 profitable zoo tips guide goes deeper on pricing curves, donation bin placement, and restaurant layout, but the 25-tile rule is enough to keep most early parks above water.
Education Boosts Conservation
Speaker boxes, information boards, and keeper talks all feed into a hidden education score that directly increases donations and unlocks conservation credits. According to community testing, a habitat with two speakers and one information board pulls roughly 1.4× the donation income of an identical habitat with no education props. That is a huge return for what amounts to a few scenery items.
| Income Lever | Effect on Revenue | Effect on Guest Happiness | Best Range |
|---|---|---|---|
| Shop prices | High | Negative if too high | 110–130% of base |
| Donation bins | Medium | Neutral | 100% (repeats best) |
| Education props | Medium | Positive | 2+ per habitat |
| Amenity density | Low–Medium | Strongly positive | 1 per 25 tiles |
| Conservation status | High (late game) | Strongly positive | Filter 2+ threatened species |
Frequently Asked Questions
What is the easiest way to start a Planet Zoo 2 zoo layout?
Start by placing the entrance, a service spine behind it, and one showcase habitat inside the first 20 minutes. The official Basics guide recommends this exact order because it gives you an immediate guest flow and a stable power grid before expanding. Sketching the three-zone template — guest loop, service spine, habitat cluster — on paper before placing anything saves hours of demolition later.
Are there Planet Zoo 2 hidden features that affect layout?
Yes, the heat map overlay, scenery layering slider, and auto-buy trade centre toggle are three of the most useful. Each lives one or two submenus deep and is never surfaced in the tutorial. Discovering them mid-playthrough is one of the most common Planet Zoo 2 things I wish I knew moments, because they change how every habitat looks and runs.
Which mode is best for testing advanced building tips?
Sandbox mode is the cleanest test bed, because it removes conservation quotas and unlocks infinite cash. Build a small park, experiment with the Flexi Colour tool, multi-level habitats, and 0.5m grid snapping, then carry the techniques into Career or Franchise. Players who prototype in Sandbox typically finish Career scenarios faster, because they already know which tricks survive contact with a real budget.
Can I reuse a layout across multiple saves?
Yes, by uploading the finished park to the Workshop as a blueprint and re-downloading it into a new save. Sharecodes captured in the official Features page let you share an entire zoo, a single habitat, or even a complex scenery cluster. Combine this with the pre-built blueprint packs documented in the Planet Zoo 2 pre-built zoos reference and you can scaffold a 1,000-guest park in under an hour.
How do I keep guests from clustering in one corner?
Spread amenities in clusters of three — restroom, drink shop, and donation bin — placed at the corners of your habitat grid, and add a speaker near each cluster. Community reports show this layout reduces guest congestion by roughly 30% compared with piling every amenity near the entrance. If you want a deeper look at guest behavior and the science of the heat map, the Planet Zoo 2 story mode scenarios guide covers how Career missions teach these same patterns by stealth.